Wednesday, December 19, 2018

My Favorite Sugar Cookies

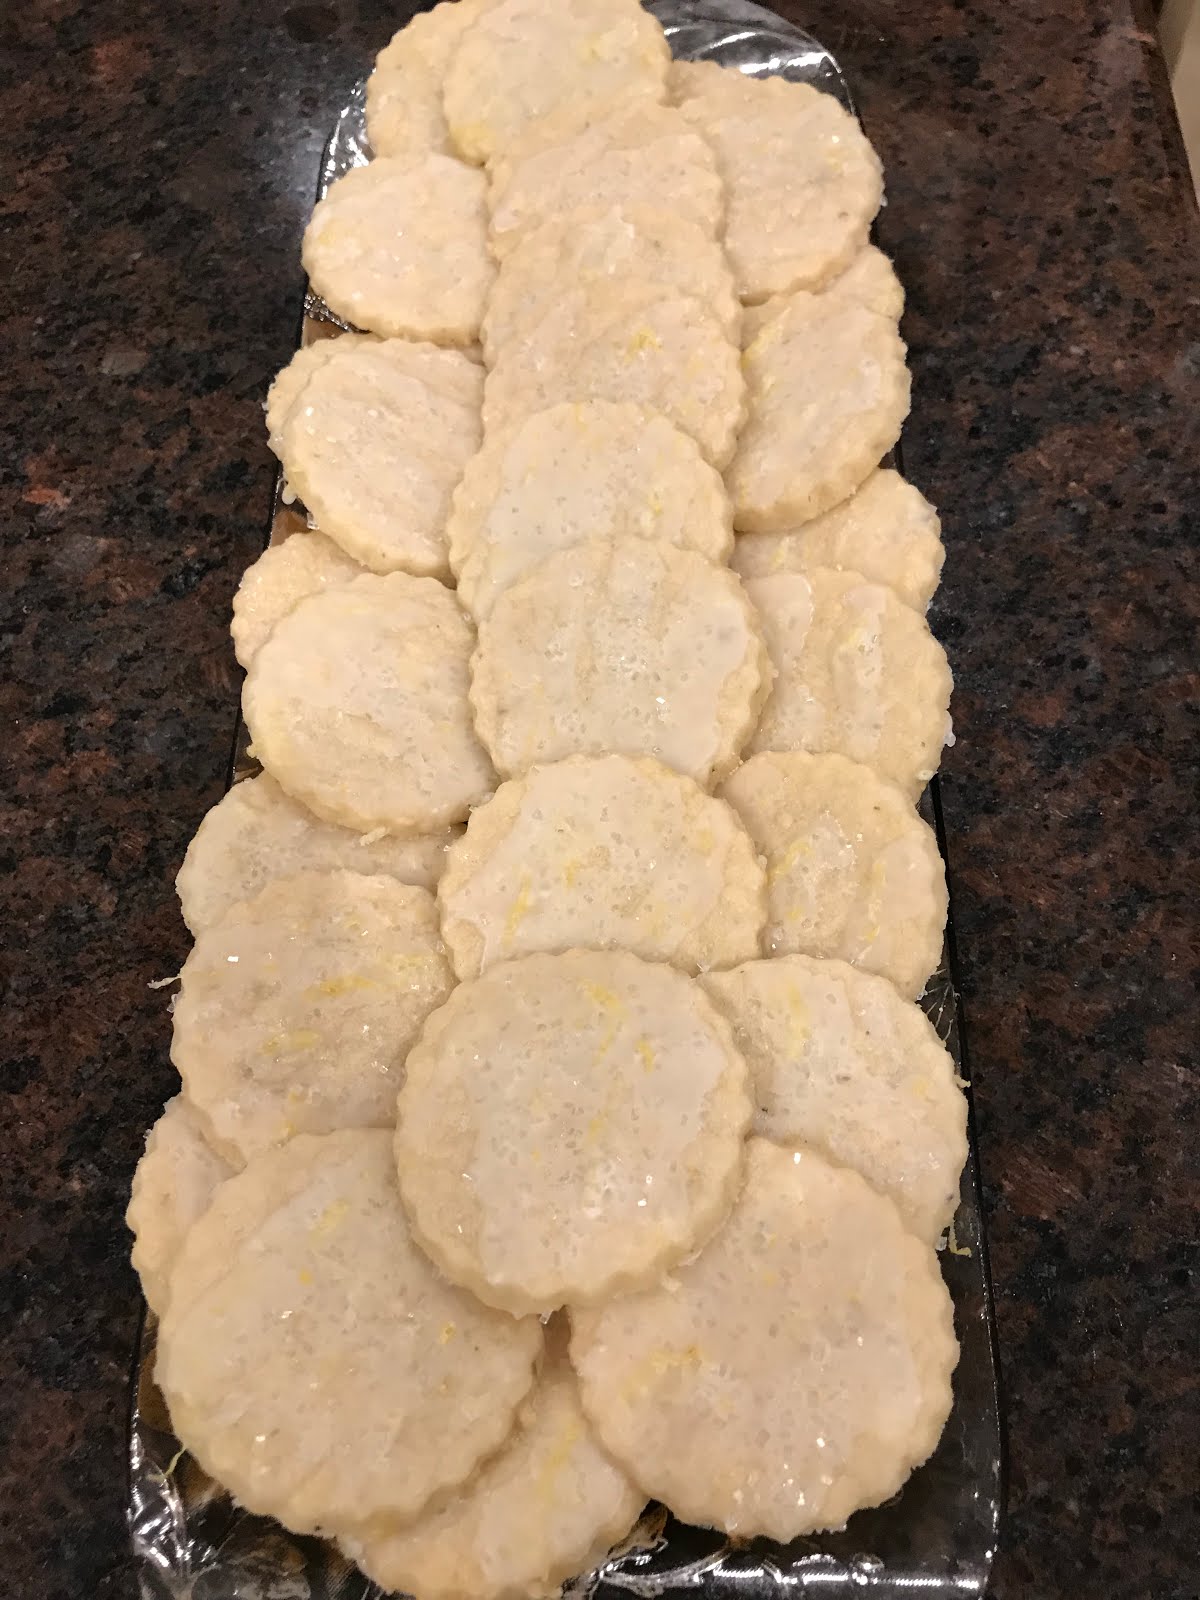
Over the years, I have collected sugar cookie recipes and these are my favorite ones this year...


This recipe is from bakingamoment.com: https://bakingamoment.com/soft-cut-out-sugar-cookies/

HERE ARE A FEW HELPFUL TIPS TO GUARANTEE SUGAR COOKIE SUCCESS:

  • If you love your sugar cookies soft, be extra-careful not to overbake them! Your bake time could vary based on how thick you roll the dough, and what size cookie cutters you use. If the dough is rolled thinner than noted, and the cutters are small, you probably won’t need the full bake time listed on this recipe card. Use your judgement, and pull them from the oven when the edges feel set and the cookies are just barely beginning to turn golden on the bottoms. If you bake them too long, they could become hard.
  • You can decorate these cookies with royal icing too! I made a big batch to donate to my kids’ school, and they came out fantastic. The sour cream frosting is just a little quicker/easier, and it tastes so good!
  • If you want, you can skip the sugar cookie icing, and just use sprinkles instead. Top the cut-out shapes with sprinkles before they go into the oven.
  • These sugar cookies can be baked several weeks ahead and frozen. Just stack them up in a zip-top bag and pop them in the freezer. When you’re ready to serve, let them thaw at room temperature (with the bag open), and frost them with icing.
  • If you prefer to chill the dough, you totally can. (Refrigerate for 2 hours or overnight.) I’ve tried it both ways: with and without chilling, and both work beautifully. If you chill the dough, it’s a little harder to roll out, but the shapes cut very nicely. I prefer not to chill because I am impatient. It still works well, but I do think it’s helpful to dip your cookie cutter in flour before every cut.
  • If you’d like to make a gluten-free sugar cookie, just sub out the all-purpose flour for a gluten-free flour blend. 
  • For a dairy-free sugar cookie recipe, use cold (solid) coconut oil in place of the butter, and use vegan cream cheese.
  • These soft sugar cookies will keep at room temperature for 1 day, or in the fridge for about a week.
  • The sugar cookie frosting will form a slight crust on the top after about an hour, but it will remain soft and moist underneath, so be careful about stacking them!
Best-ever recipe for soft sugar cookies you can roll and cut out with cookie cutters! Easy to make, no chilling required, and they don't spread into shapeless blobs as they bake. Made with a secret ingredient that gives them the most incredible flavor, and topped with a cool sour cream icing.
Ingredients
FOR THE SOFT CUT-OUT SUGAR COOKIES
  • 1 cup unsalted butter, cold
  • 4 ounces cream cheese (half a brick)
  • 1 cup granulated sugar
  • 1 large egg yolk
  • 2 teaspoons vanilla extract
  • 1 teaspoon almond extract
  • 2 3/4 cup all-purpose flour
  • 1/4 cup cornstarch
  • 1/2 teaspoon kosher salt
Instructions
TO MAKE THE SOFT CUT-OUT SUGAR COOKIES:
  1. Preheat the oven to 375 degrees F and line baking sheets with silpat mat or parchment paper.
  2. Place the butter, cream cheese, and sugar in a large mixing bowl and beat on medium-low speed until smooth (about 1 minute).
  3. Add the egg yolk, vanilla, and almond extract and mix on medium speed until combined.
  4. Scrape the bottom and sides of the bowl with a silicone spatula, then add the flour, cornstarch, and salt.
  5. Mix on medium-low speed until a stiff dough forms (about 1 minute).
  6. Roll the dough to 1/4-inch thick (rolling pin rings ensure an even and exact thickness) between 2 sheets of parchment paper.
  7. Remove the top sheet of parchment, and cut shapes.
  8. Peel the shapes from the bottom layer of parchment, and place on the prepared baking sheets.
  9. Bake for 12 to 16 minutes, or until just barely beginning to turn golden on the bottoms.


If you want a spice-type cookie I like SweetAmbs Orange Vanilla Spice Cookie:

From her website: This is my preferred roll out cookie recipe when decorating with royal icing. This orange vanilla spice cookie* is slightly chewy on the inside with crispy edges, keeps its shape while baking, and tastes great. It contains orange zest, vanilla bean and cardamom to give the cookies a unique flavor. It also contains agave syrup, which helps to keep them soft. Agave syrup browns more quickly than sugar, so keep that in mind when baking. This recipe is ideal for making cookies that will be decorated with royal icing. You can omit the orange zest and cardamom from the recipe for a plain cookie, or try different flavors such as almond extract and lemon zest.

You will receive the recipes in both U.S. and metric measurements with this purchase.

—

*For a plain cookie, omit the orange zest and cardamom. Don’t be afraid to experiment with other flavors! Try a combination of almond extract and lemon zest for a twist on this recipe.

 
Since she sells it on her website I can't post her recipe but you can find it here: http://www.sweetambs.com/sweetambs-cookie-recipe-and-royal-icing-recipe/

It is hard to find a royal icing recipe I like but I LOVE the one from the Cookie Countess. She has GREAT tutorials, inspiration, and I get a lot of my products from her too (such as the Genie's Dream Meringue Powder and the Genie's Clearly Not Vanilla -- 

Here's the link to her recipe and you can link to her other pages here too: https://www.thecookiecountess.com/pages/royal-icing-recipe

Royal Icing Recipe

This is my all time favorite royal icing recipe! This recipe uses 2 lbs of confectioners sugar - but you mix in 1lb at a time. If you buy a 2lb bag just eyeball half the bag. This recipe also doubles quite nicely.
Use a stand mixer with the whisk attachment to start.
  • 1/3 cup Meringue Powder I prefer Genie's Dream Meringue Powder 
  • 1/2 cup of warm water (plus 2T if you will not be adding the lemon juice from next steps)
Whisk until doubled in size, 1-2 minutes. Do not over mix.
  • 1/4 - 1 tsp butter flavoring (depending on brand) I like LorAnn. You may question if this step is worth it - but it is! (Note from Karen: I only use LorAnn too!)
  • 1 tsp vanilla I love Genie's Dream Clearly Not Vanilla, it has great flavor and no color (so it won't tint your icing).
  • 1 tsp almond extract  (This is Karen's add:) I add this to the recipe because I love almond extract in everything from pancakes to scones!
  • 2 tbsp fresh lemon juice In real life I never measure this. I just use the juice of whatever lemon(s) I used in making my cookies. This is optional, but the lemon really cuts the sweetness of the icing nicely.
Mix until just incorporated
  • 1lb of confectioners sugar
Mix until incorporated
  • 1 tbsp light corn syrup
Mix until incorporated
  • 1lb of confectioners sugar
Mix until fully incorporated
Continue to mix for about 3 minutes on high - your icing will start to turn white and have a fluffy look. But do NOT over mix. Over mixing can cause the icing to collapse. This will yield a VERY stiff icing. If you feel it is too stiff even to start with, add small amounts of water.
But it is best to start with very stiff icing for a few reasons. If you are going to store it at all before using, the less water, the less it separates. When you color your icing, this adds liquid, so you may regret adding too much water to start with. Add your color, and then your water to bring it to the consistency you want. For more about icing consistency check out Sugarbelle's blog. Tons of great info! 


Monday, November 5, 2018

Pumpkin Spice Granola

Love Gimme Some Oven's Pumpkin Spice Granola. See her original recipe here: https://www.gimmesomeoven.com/pumpkin-spice-granola/


INGREDIENTS:

  • 2 cups old-fashioned oats (use certified gluten-free oats if making this GF)
  • 1 cup raw pecan halves
  • 1 cup raw pepitas (pumpkin seeds)
  • 1/4 cup maple syrup
  • 1/4 cup melted coconut oil
  • 1/4 cup pumpkin puree
  • 1 1/2 teaspoons pumpkin pie spice
  • 1/4 teaspoon vanilla extract
  • 1/2 teaspoon salt
  • (optional) 1/2 cup shredded or shaved coconut
  • (optional) 1/2 cup white or semisweet chocolate chips

DIRECTIONS:

Heat oven to 350°F.  Spray a large  baking sheet with cooking spray, or line it with parchment paper.  Set aside.
Combine the oats, pepitas and pecans in a large mixing bowl.  In a separate bowl, whisk together the maple syrup, melted coconut oil, pumpkin puree, pumpkin pie spice, vanilla extract, and salt together until smooth.  Pour the maple syrup mixture over the oats mixture, and toss until everything is evenly mixed.
Spread the granola mixture out evenly on a greased or parchment-lined baking sheet and bake for 15 minutes.  Remove from the oven and add in the coconut (if using) and give everything a good stir.  Return the granola to the oven and cook for an additional 10-15 minutes, or until the mixture is golden.  Remove and let the granola cool until it reaches room temperature.  Stir in the chocolate chips (if using).
Serve immediately, or store in a sealed container for up to 2 weeks.

Saturday, October 20, 2018

Almond Shortbread Cookies

*The shortbread are the center cookies; see recipe for Peanut Butter Shortbread Bars for the chocolate covered bars.
INGREDIENTS
  • Butter (to butter the pan)
  • 1 stick unsalted butter, cut into 1-inch slices, room temperature
  • 3/4 cup (148g) sugar
  • 1 cup (120g) flour
  • 1/2 cup (56g) cornstarch
  • 1/2 cup (48g) almond flour
  • 1/2 teaspoon salt
  • 1 teaspoon vanilla extract
  • 1 tablespoon milk
  • 1/3 cup sliced almonds
  • Powdered sugar (for sprinkling)

  1. Preheat the oven to 350ºF. Generously butter a 9-inch pie pan, or a tart pan with a removable rim.
  2. Mix butter and sugar until creamy.
  3. Stir in flour, cornstarch, almond flour and salt. Mix until combined. Beat in vanilla and milk just until combined. Knead with your hands if necessary; the dough will come together in big clumps.
  4. Press dough into the pan: Scrape the dough into the pan and press into an even layer into the bottom of the pan (it should not go up the sides).
  5. Cover the bottom of a 1-cup dry measuring cup with a piece of plastic wrap and use it to smooth the dough evenly in the pan.
  6. Cut the dough into wedges and chill: Cut the dough into 12 or 16 wedges. Scatter the sliced almonds over the top and press them gently into the dough. Chill for 30 minutes, until firm, or up to 2 days. (If chilling overnight or longer, cover the pan with plastic wrap.)
  7. Bake the shortbread: Set the pan on a rimmed baking sheet, and bake for 25 minutes, or until the edges begin to brown.
  8. Cover loosely with foil and continue to bake for 15 to 25 minutes, or until the dough feels firm and looks golden.
  9. Remove from the oven and let cool for 10 minutes. While the shortbread is still warm, carefully cut the wedges again to make sure they're separated. Leave in the pan until completely cool.
You can store shortbread in an airtight container for up to 3 days or in the refrigerator for up to 7 days. Sprinkle with confectioner's sugar before serving, if desired.

Peanut Butter Shortbread Bars

*Taken from https://sugarspunrun.com/peanut-butter-shortbread-bars/


Shortbread Crust

1 c unsalted butter softened 226 g
1/3 c sugar 70 g
1/3 c light brown sugar tightly packed 70 g
1 large egg yolk
3/4 t vanilla
1/2 t salt
2-1/4 c all purpose flour 260 g

Peanut Butter layer

2 c creamy peanut butter 476 g
1/2 c butter cut into about 8 pieces 113 g
1 t vanilla
2-1/4 c powdered sugar 260 g
1 T milk 15 ml

Chocolate Ganache

2 c semisweet chocolate chips or good chocolate 340 g
1/2 c heavy cream 120 ml
1/2 t vanilla
sea salt for sprinkling

Shortbread


  1.  Preheat oven to 350 and line a 13x9 baking pan with parchment paper.
  2.  Using mixer, beat butter and sugars until well creamed, about 30 seconds.
  3. Add egg yolk and vanilla and stir well, pausing to scrape down the sides and mixing until ingredients are well-combined.
  4. Add flour gradually (about 1/2 c at a time), pausing to scrape down sides of bowl. Halfway through the addition of the flour, sprinkle in the salt with the beater still running.
  5. Don't over-beat the dough, you want it to be sightly crumbly to make it easier to press into the pan.
  6. Drop dough over prepared pan and gently, evenly, press dough into the bottom of the pan. To make it easier, you can use a piece of wax paper over the dough and use your palm to smooth the surface (and then discard wax paper).
  7. Bake at 350 for 20-25 minutes (watch it -- I had less baking time!) -- edges should be lightly golden brown.
  8. Allow to cool completely before adding peanut butter layer.

Peanut Butter Layer

  1. Combine peanut butter and butter in large heat proof bowl and microwave at 15-second increments (stirring between each) until butter is completely melted.
  2. Stir in vanilla.
  3. Gradually stir in powdered sugar.
  4. Add milk and stir well. Mixture should be firm enough that you can mold pieces into a ball, but not too stiff that you won't be able to spread it over the brownies (feel free to add additional milk, 1 teaspoon at a time, if mixture is too stiff, or more powdered sugar, 1 Tablespoon at a time if mixture is too soft).
  5. Drop peanut butter mixture by heaping spoonfuls over the cooled brownies and use a knife to gently spread until the shortbread layer is evenly covered with a thick layer.


Chocolate Layer

  1. Combine chocolate chips and heavy cream in a small saucepan over medium heat.
  2. Stir frequently until chocolate is melted and mixture is smooth.
  3. Remove from heat and stir in vanilla extract. Allow chocolate to cool for about 15 minutes, and then evenly spread over prepared caramel layer. Wait several minutes and then sprinkle with sea salt.
  4. Allow chocolate to harden (I recommend placing in refrigerator for about 30 minutes -- my family prefers these treats refrigerated anyway) before cutting and serving.


Lemon Lavender Shortbread Cookies

*Taken from http://tutti-dolci.com/2017/04/lemon-lavender-shortbread-cookies/


Cookies

2/3 c sugar
2 t Meyer lemon zest
1/2 g dried culinary lavender
3/4 c unsalted butter, room temperature
1 t vanilla
1/8 t salt
1-3/4 c flour
1-1/2 T sugar for sprinkling

Glaze

1 c powdered sugar
1 t Meyer lemon zest
2 T Meyer lemon juice

1.  Combine sugar, lemon zest and lavender in a food processor and pulse for 1 minute until lavender is finely chopped. Beat butter and lemon-lavender sugar in a large mixer bowl at medium speed until combined; add vanilla and salt and beat until incorporated. Scrape down bowl as needed. Reduce speed to low and mix in flour just until incorporated and dough begins to come together in large pieces. Scrape dough out onto a piece of plastic wrap, shape into a disk and wrap well. Chill dough in the refrigerator until firm, about 30 minutes.

2.  Preheat oven to 350 and line two baking sheets with silicone mats or parchment paper. Roll out dough to slightly less than 1/4" thick on a lightly floured board. Use a floured 2-1/2" fluted biscuit cutter to cut out cookies. Gather scraps, re-roll, and cut until you have 24 cookies. Place cookies on baking sheets and sprinkle with sugar. Chill for 20 minutes in the refrigerator.

3.  Bake, rotating pans about halfway through, for 14-15 inutes, until lighty golden and edges are set. Cool for 5 minutes on baking sheets, then transfer to a wire rack to cool completely. For the glaze, whisk together powdered sugar, lemon zest and juice in a small bowl. Trnaser glaze to a small piping bag and drizzle over cookies; let set before serving.

NOTES:

Make ahead: Baked and cooled shortbread cookies can be wrapped well and frozen up to 2 months. To thaw cookies, place on wire racks and let stand at room temperature for one hour before glazing.

Thursday, July 5, 2018

Dulce de Leche Cupcakes in an Ice Cream Cone


This is Anna Olson's recipe! https://www.youtube.com/watch?v=FEjrOASmvhs

Note: I used small muffin tins to place the cones into but it was really hard because they kept wanting to fall over. I know I will be making these more so I ordered these:


If you think you will be making them a lot, order the easier to bake in holders for the cones! If you are only making them once in awhile use the mini cupcake tins but BE CAREFUL (maybe consider putting the tins in the oven and THEN placing the ice cream cones into them!

The recipe ingredients and instructions makes 18 cupcakes

Dulce de Leche*    **
1 300 mL tin sweetened condensed milk
1 cup whipping cream
3 T brown sugar

*I made the dulce de leche a different way because a lot of the comments said Anna's was too light and I thought I wouldn't like it that way -- here is the optional way I used because I used to do this all the time to dip apples into in the fall: I covered two cans of sweetened condensed milk with water (make sure it is over an inch over the cans) and brought it to a boil then simmered for 2-1/2 hours, being sure to check it every 20-30 minutes to be sure the water is well over the cans or they can explode. Then pour out the hot water and cook the cans. You can make it in advance and keep it on the counter for a week. It turns into dulce de leche!
**Option 3 is to purchase already made dulce de leche, typically found in the grocery where dessert sauces are located.

Cupcakes 
18 flat-bottom ice cream cones
1/2 c unsalted butter, room temperature
1 c packed light brown sugar
3 large eggs, room temperature
1-3/4 c all-purpose flour
1 t baking powder
1/4 t salt
1/2 c 2% milk, room temp
1 t vanilla extract

Frosting
1/2 c unsalted butter room temp
1/4 c dulce de leche
2 c icing sugar (confectionary sugar) sifted
1 t vanilla extract
1/4 t salt

dulce de leche or melted chocolate for drizzling tops

Baking directions:

Dulce de leche (if you don't use my optional method above).
1. Pour thew condensed milk, whipping cream and brown sugar into heavy-bottomed sauce pot and, whisking or stirring constantly, cook over medium heat until thick and caramelized, about 15 minutes (you may have to adjust the heat and the mixture will get quite thick). Cool and then chill until ready to use.

Cupcakes
1. Preheat oven to 350. Place ice cream cones into mini muffin tins (or containers shown above)
2. Beat butter and sugar until creamy. Add eggs one at a time, beating well after each addition. In separate bowl, sift the flour, baking powder and salt. Measure the milk and stir the vanilla into it. Add the flour alternately with the milk, starting and ending with the flour and beating well after each addition.
3. Drop a tablespoonful of dulce de leche into the bottom of each ice cream cone. Use an ice cream scoop to scoop batter into each cone (just let the batter be - it will sink into place on its own). Bake the cupcakes 25-30 minutes, unti a tester insert3ed in the centre of the cupcakes comes out clean. Cool completely before icing.

Frosting
1. For the frosting, beat the butter with the dulce de leche until smooth. Add the icing, sugar, vanilla and salt and beat until well blended. Fill a piping bag fitted with a large plain tip and pipe swirls on top of each cupcake. Drizzle remaining dulce de leche or melt3ed chocolate on top. Chill until ready to serve.
2. The cupcakes are best served the day they are made.

Recipe by Anna Olson, https://www.youtube.com/watch?v=FEjrOASmvhs